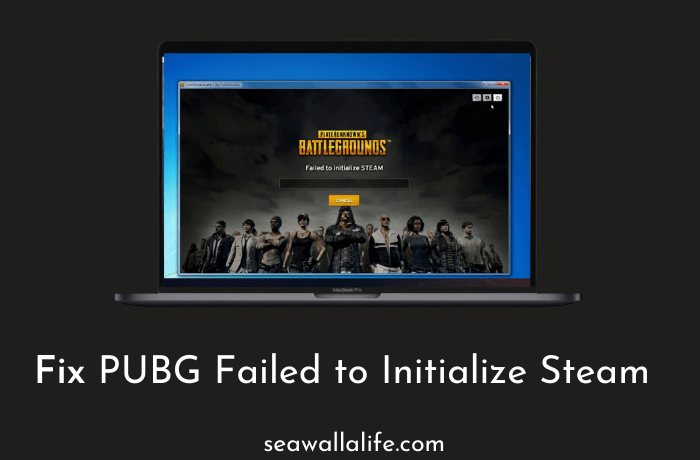
PUBG is one of the most popular games on the internet. It has a significant following on the internet. Millions of online gamers are playing it across all platforms. Our focus is on the PC gamers who have spent their hard-earned money to buy this game. There are a few problems that can plague anyone. Pubg failed to initialize steam error is one of them. It is a dreadful error that every gamer wants to avoid.
In this guide, we will try to show you the process of fixing this issue. A little bit of research can take your gaming experience to the next level. We all want to enjoy excellent gameplay and the fantastic battle royale mode.
PUBG Failed to Initialize Steam? Here are the Best Ways to Fix
There is no specific reason which can be pointed out. Thousands of users face this problem. Everyone has a unique experience with the game. Hence we are taking a look at multiple methods to fix this problem. Our expert team also came across this problem. It is the reason why we want to discuss this issue in detail. Read along to know more about the different methods available here.
Method #1:
The first fix is quite simple. It doesn’t require a lot of tech expertise. Anyone who has been using steam should be able to do it quickly. We recommend that you check the integrity of your game files. Sometimes when we are too excited about a game, it can be a curse. Internet issues are common across the world. The game download size is enormous, and a single file can render your installation useless. The verification process will match your game files with the server. If any file is missing, then that specific file will be available for download. Here are the steps to verify your game files on steam.
Method #2:
The second fix that is available for this heinous issue is going to take things further ahead. A few users tend to face the problems with the Steam client itself. The application can get buggy leading to the “ PUBG failed to initialize steam” error. We are going to try and fix the steam client and get our game running once again. Follow the given below steps.
- Run command prompt (Admin)
In this process, we will repair the steam client using the command prompt. To make changes to any application, we need Admin privileges. We must run the application in the administrative mode.


You can search for cmd in the windows search bar. Right-click on the search result and select run as admin. It will also automatically show up in the search results.
Once CMD is running in the admin mode, we can start using the repair process. You can enter the following codes – C:Program Files (x86)SteambinSteamService.exe /repair. Depending on your drive location, make the changes. You can copy-paste this code from here to get the best results. It will automatically start the repair process on your computer.


- Find the steam service path
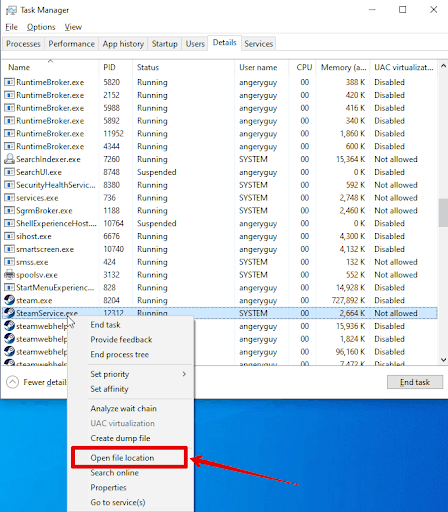
Many people might face issues with finding the steam service path. You can easily find it using the task manager. Run the application on your computer and visit the details section. Here you have to find the steam client service option. Right-click on the data and then select the open file location. It will take you to the directory of the steam process.


After doing all these steps, the final step is to restart your computer. It will ensure that all the changes take effect.
Method #3:
The third fix in this guide is fundamental. The process is not going to take you a lot of time. Many users might be facing trouble accessing their files. It is essential to try everything to solve this problem. In this fix, we will run the steam client as an administrator on the PC. It will give the application access to all the files and work efficiently with PUBG. You can quickly start playing the game again in no time. We recommend that you visit the steam logo on your desktop and run it as an administrator.
Method #4:
The fix is yet another simple solution that the ordinary mind doesn’t think about usually. In this fix, we will be disabling the full-screen optimization issue. A few games and the steam app can be facing problems because of this error. It can cause the “PUBG failed to initialize steam issues.” You can disable this problem by visiting the steam directory on your computer. Here are the steps.
- Users have to start by visiting the installation location of their computer. You can ideally find it in the C drive program files section. Select the steam client icon and then right-click on it. At the bottom, you will see the properties section.
- In the properties tab, you have to visit the compatibility section. Select the disable full-screen optimization options that can be seen. You have to apply the changes before you can enjoy the game again.
Amazing! Now you can try using PUBG again on your PC.
Conclusion
These were some of the fantastic tricks we were hoping to share with you. The PUBG failed to initialize steam error is quite common. You can quickly fix such issues right at home. We hope this guide helps you to solve the problem.


